Pages

Tuesday 31 December 2019

Class 47 BR blue with DCC sound

I hope everyone has had a great Christmas and is looking forward to a fun filled new year.  With a couple of free days during the festivities I have had some time to get on with some modelling - the airbrush is up and running and I am looking to finish off some projects that have been hanging around in the paint boxes.  In the meantime I thought I would produce a better update on the recently finished class 47.

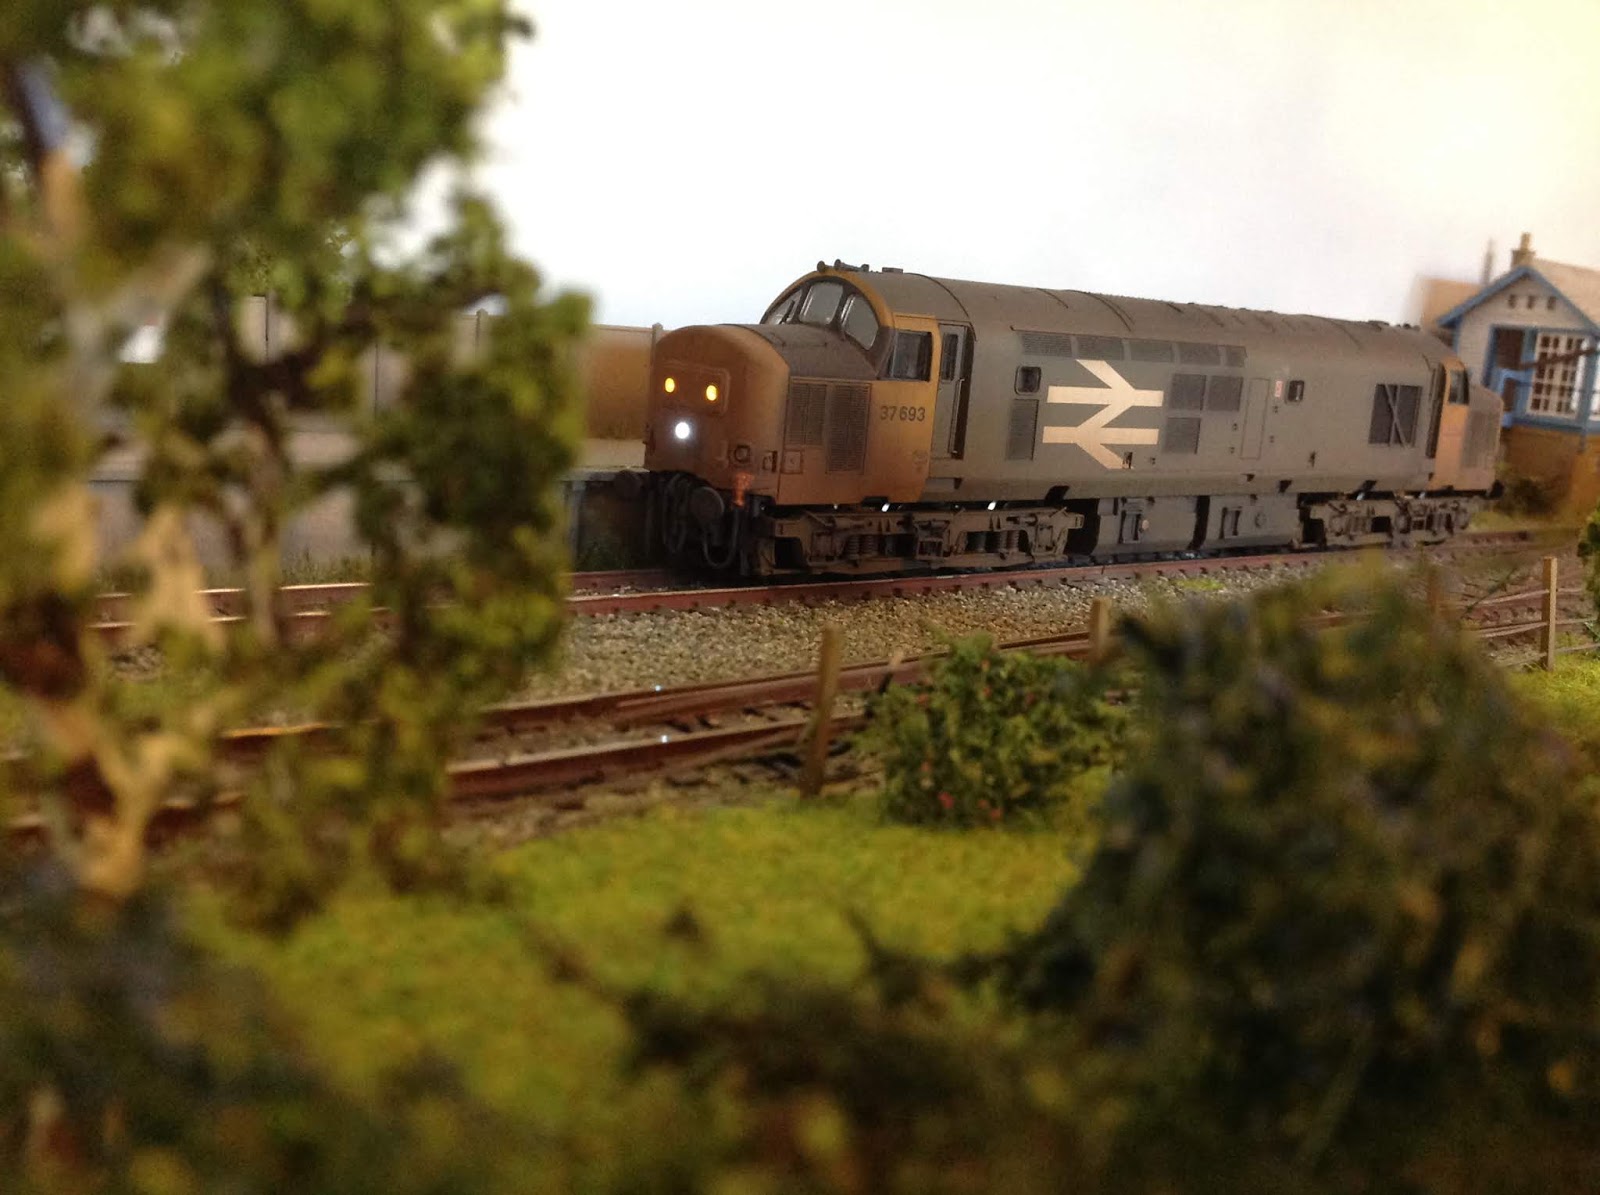
The finished class 47 shunting at Charlton station.

The class 47 running light out of Charlton.

Another view of the completed loco - ready to head back to Barnstaple.

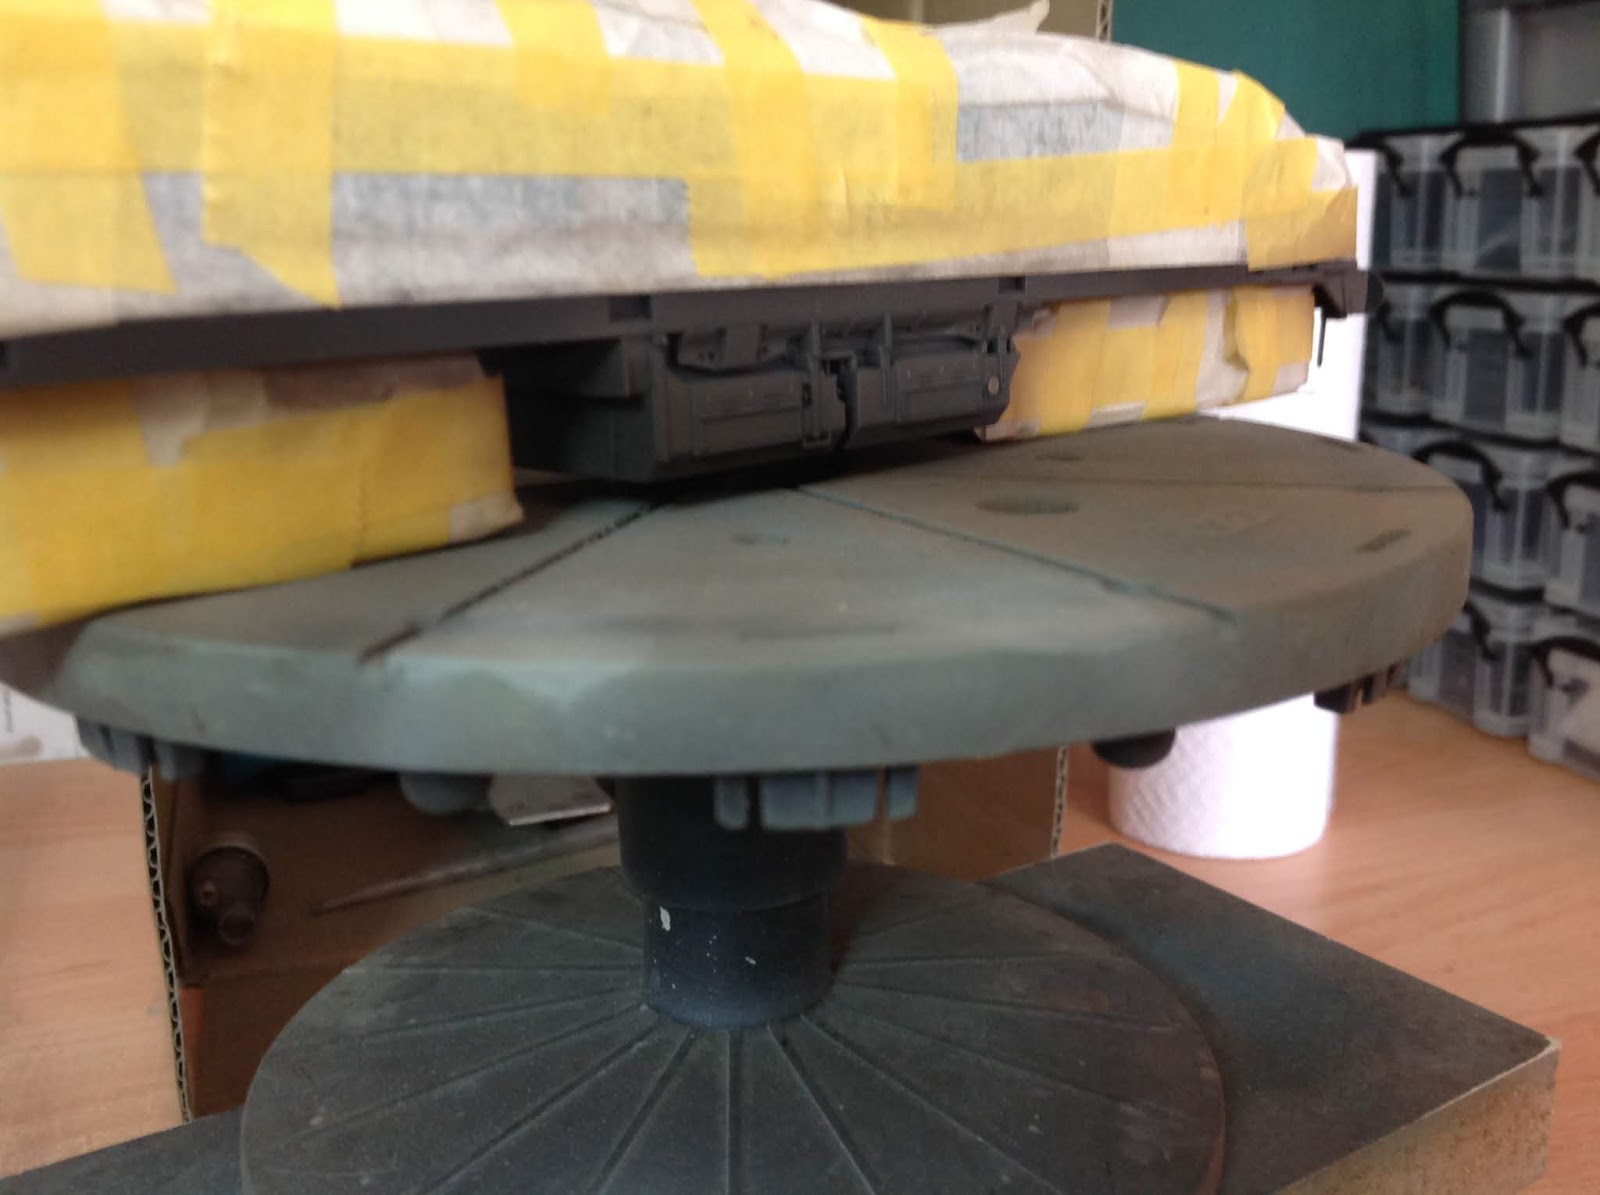
The model is the first Bachmann offering with a 21 pin DCC socket.  I purchased this locomotive on special offer from Hattons, about 10 years ago for the princely sum of £50.  It has sat around in its box since then.  I have always meant to make on a start on this locomotive, but never got around to it!  Anyhow the model was finally taken apart this year.  The glazing and cab were removed from the body and the bogie frames from the chassis.  All the details were added to the bufferbeam and then everything was masked off ready for spraying.  With all my detailing projects I start with an all over body wash on the body shell - a mix of sleeper grime and weathered black.  This is mainly brushed off, before spraying some different mixes of weathered BR blue over the body, intermixed with some light weathering using sleeper grime, frame dirt and weathered black. The grills had weathered black sprayed into them and the roof treated to a healthy dose of roof dirt.

The body wash applied, with parts of the wash removed.  This was taken part way through the process.

The body shell with streaks of faded blue, sleeper grime and weathered black applied.

 The body shells with roof dirt and weathered black sprayed into the grills.

The chassis and bogies were also sprayed with various shades of weathered black, frame dirt, sleeper grime, brake dust and matt white.  When all this had been completed the body was reassembled and reglazed.

Chassis masked off and with the first coat of weathering applied.

The bogie frames with brake dust, weathered black, and frame dirt added.

The chassis with the fuel tanks having sprayed with sleeper grime, frame dirt and weathered black.

The sound decoder is a Loksound v 4.0, fitted with Howes sound.  I must say, this is an absolute belter.  As soon as it was fitted I was delighted with the sound.  There is plenty of room inside the body shell for a speaker, so I could fit my speaker of choice; a Road and Rails double Iphone speaker.  The sound quality on these speakers is fantastic and it sounds like the real deal.

The decoder with the double Iphone speaker soldered up.

All fitted and ready for reassembly.

The locomotive was then reassembled and tested.  Despite sitting in a box for 10 years it runs like a dream.  I am very happy with how this one turned out.  I ran it for the first time at the Brighton exhibition a few weeks and it ran faultlessly.  Whilst not strictly common for the Tarka line in the 1970s, a little bit of modellers licence can be applied, they were common in Exeter St Davids from the 1970s onwards, so why not have one trundling up to Torrington or Ilfracombe!

Class 47 running into Charlton.

Class 47 heading back to Barnstaple with a short train.

Sunday 22 December 2019

Another Milk Tanker - and Merry Christmas

Another few weeks seem to have flown past.  The airbrush has been firmly packed away and the partially built models have been gathering dust on the work bench.  I have had to work away for several weeks, which really disrupts the rhythm of modelling and life in general.  However, with Christmas now here, I have managed to gain some days for uninterrupted modelling over the festive period.  This is virtually unheard of and is something I am really looking forward too.

Finished milk tanker.  As per previous posts it is not the best model there is, but it is about all there is!

Anyhow, prior to travelling away I did get another milk tanker finished off.  This is the third milk tank I have finished; overall I am going for a train of 5 milk tankers.  I am planning to build a small 00 gauge layout next year, a small 3ft box to act as a test track, although it will have a small goods shed with it, with milk loading facilities.  I am gathering some buildings for this and hope to start building in earnest early next year.  Let's see how this progresses next year.

Another shot of the wagon after some shunting.

I have lots of small projects almost finished, so I hope to be able to finish some these off over the break.  In the mean time I wish everyone a very merry Christmas.

Friday 29 November 2019

Another goods van and Hailsham Model Railway Show

After the last show at Brighton MRC I have another show booked for this weekend at Hailsham. It is a one day show, but I am looking forward to another day playing trains - even with a very early start.  Between shows I managed to finished off another wagon for use with the provender store.  This is another weathered rtr model from Bachmann.

Factory finish on the wagon.  It is very shiny making the wagon look toy like.

As per normal I added three link couplings before giving it a good wash. It was then treated to some weathering, including an initial all over body wash of black/sleeper grime.  I then picked out a few details on the underframe using the air brush, before some frame dirt, sleeper grime and roof dirt were sprayed over.  The Bachmann underframe is a little chunky but with a little bit of weathering the wagon looks ok.  

Finished 12t wagon.

Being shunted at Charlton with the recently finished class 47.

A few other projects are heading for completion soon, so further updates to follow.. 

Sunday 17 November 2019

Charlton at the Brighton MRC Exhibition

I have just completed two days of exhibiting on my own at the Brighton MRC exhibition.  This is a great little show.  The members of Brighton MRC are very friendly and it was a pleasure to be invited along.  The show is very family orientated and it was fantastic to see lots of young aspiring modellers watching the trains go by.   Charlton performed near faultlessly, although I have a small list of repairs to make, namely one dodgy wire and replacing a station lamp.  Other than this all good.  The new class 47 performed fantastically well, as did the new class 33 - both had a good run out today.  A very pleasurably, if not slightly knackering, two days!

The layout almost set up on Friday evening - the weekend has literally flown by!

And the new class 47 on the layout - I am really pleased with how this one turned out!

Monday 11 November 2019

Class 47 with Howes DCC sound, plus Brighton Model Railway exhibition this weekend

Over the last week I grabbed the odd hour here and there to put the class 47 back together, a job that did not take too long.  This is a quick update and I will write a more detailed post on this project soon, with some detailed snaps taking during the painting of the locomotive.  However, with the layout in storage, getting a quick photograph with a good background is difficult.  Thus I took a quick snap of it tonight on my work bench alongside a quick test run of the sound chip.  The verdict - overall I am pretty happy with this one - it looks and sounds great.  You are never quite sure how the locomotive will look until it is sat on a layout with the scenery providing the context - but looking at the quick snaps of it tonight I think this one is looking the part, with the caveat that the lighting in the model room is pretty awful.  I think I purchased this locomotive during 2010 ofr £50 - so it is fantastic to see it finally sorted out and ready to use.

Class 47 finished!

The reassembly of the locomotive was the normal heart in the mouth moment, trying not to damage the paintwork - however it all went back together reasonably smoothly.  The sound chip is Howes and this is definitely another belter from them.  Finishing the locomotive last week meant that it is now available to run on the layout this weekend, when I am exhibiting Charlton at the Brighton Model Railway Exhibition (http://www.brightonmrc.com/exhibition.htm).  I will attempt to take some proper photographs of it then.  It is great to have a new locomotive to use and this will be on the rosta alongside the recently finished class 33.  The class 25 and class 22 will be making up the rest of the motive power - so if you are about please come along and say hello.  

A quick test run of the DCC  chip: verdict - I think this sounds great!

Thursday 31 October 2019

A class 33 with Howes DCC sound

Several years ago I finished the detailing on a Heljan class 33/2, and at the time I was really pleased with the weathered finished I had achieved.  It was one of the first models I had finished that several years later I am still reasonably happy with.  Bar a few knocks and scrapes on the model, the weathered finish has held up well and it has happily run on my layouts.  The recent destruction of the class 45 at an exhibition meant that I was an engine light in the rolling stock rota, so I thought I would treat this class 33 to a sound upgrade. A nice quick easy job or at least so I thought at the time!

Micro-speaker plus the removed fuel tanks.

A snug fit!

The issue was the lack of space for a speaker in the body.  So I took off the fuel tanks, removed the partition and glued the two halves back together.  I also drilled holes in the bottom of it to let the sound out.  There still was not a lot of room, so I ordered a micro-speaker from Road and Rails and ran the wires up past the bogie tower.  This seemed to work well, leaving only a simple solder up of the speaker wires before plugging the chip in.

Back together, with the holes drilled to let the sound out.

Even up close the speaker wires are not visible.

I ran the speaker wires above the bogie and through the bogie tower.  These were then soldered onto the speaker wires from the sound chip.

I have not set the layout up yet since adding the sound chip.  So I did a test run on a temporary track.  The verdict, as with all Howes sounds chips - it sounds fantastic.  So hopefully not does it only look the part, but it now sounds the part too.

Test run - I think this sounds great!

The class 47 project has not made any progress unfortunately, life has been a bit pushed in the last few weeks.  However, I have the Brighton exhibition coming up in mid November so it will be ready for then - it just needs to be reassembled and have the speaker and sound chip added.  I have also just ordered a new Hymek and goods shed for the next layout.....I just need a little more time....so apologies for the lack of updates recently and I hope to get some more modelling time over the next few weeks!

Saturday 5 October 2019

BR Blue class 47 heading for completion

Over the last few months I have intermittently been working on a the detailing/weathering of a class 47.  This is the Bachmann model, one of the earliest 21 pin releases, with a 4 letter head code.  The last one of these I did I filed down the window rivets, although on some 47 photographs these do seem pronounced so I have left them on this one.  

Finished weathering on the body - this is shaping up nicely....

The model still has a way to go until completion, but the main body weathering is finished.  The bogies need finishing off and I am yet to order the sound chip, another job for today. I need to reassemble the body and add the glazing back in before adding the speaker and the chip.  So in all optimism I should get this finished next weekend and I am quite happy with how it is looking at the moment.  A few other models are nearing completion too, so hopefully I will have a range of new stock for the next exhibition.

Saturday 28 September 2019

Some engineers wagons: walrus, lamprey, python, lamprey and herring

A bit more travelling around transpired in September, curtailing any dedicated modelling time.  However, through summer I have been building the odd wagon kit here and there.  I really do not need any more, but I do enjoy building and then painting wagons; there is something very satisfying about seeing them run on the layout.  So first up is a GWR python wagon.  Not an obvious choice for a BR blue 1970s/80s layout, but I am going to give it a really grubby bauxite finish for use in the engineers department.  In my opinion this kit was really awkward to build and I need to get some primer over it to see how it looks.  This will be accompanied by a GWR mink D.  The mink D will also run with the engineers stock and is only partly constructed.  

The finished GWR python wagon, ready for painting.  I found this kit tricky to build and get the sides square to the floor.

The GWR MinkD - this kit is a dream to build!

I have also made a start on a couple of walrus wagons, the first of which just needs some buffers and a few little details to finish it off.  The second walrus wagon is a long way off finished and I am just about to start a SR hopper too, to run with these wagons.  There is also a lamprey wagon I finished a couple of months ago.  On this wagon I tried to make some better handrails and I am quite pleased with this turned out.  The herring wagon is the Cambrian kit, which for some reason is now hard to come by.  This build has stalled a little, whilst I try to get my head around where all the bits go. There is also a partially constructed SR 15t brake van and a GWR Fruit D waiting in the wings, to go into the parcels stock.  This is going to be my final parcels wagon (I need to stop!).

First walrus wagon; just buffers and handrails to go.

Second walrus wagon.  This requires a bit more filling and sanding before adding the rest of the detailing parts.

A finished lamprey wagon, ready for painting.

The partially constructed herring wagon.  This is a really small hopper, but was seen on the Tarka Line working Meldon quarry in the 1970s.

Over the next few weeks I should finish the majority of these kit builds off.  This will give me some painting projects for the winter months.  I cleaned up and used the airbrush today for the first time today in several weeks and got a varnish coat on the class 47.  This will get a DCC sound chip next week and should be finished in the next couple of weeks.  There are a number of other wagons that are nearing completion in the paint boxes, so hopefully I can maintain a little momentum with these projects.  My next exhibition is in November and it will be great to have some new stock to run then.

Sunday 8 September 2019

An 0 gauge SPV

In between working on the 00 gauge Charlton layout, I have been very slowly building some 0 gauge wagons.  I have finished a grampus and a 12t open wagon, to which I can now add an SPV wagon.  Like with the 00 gauge layout, I intend to build a small 0 gauge parcels train.  The kit for this is the Parkside kit and it it went together beautifully.  The painting was quite straight forward too, however, the transfers were a nightmare!! They had a yellowish tinge/backing after being placed on the wagon, which after all the hard work of painting left me feeling a little a deflated.

The finished SPV in 0 gauge.

Side view, showing a generic dirty finish.

This was weathered over the top of to blend in this aberration.  Overall, the wagon has become a little dirty and generic, far from what I was originally intending when I started off painting it.  I am not particularly happy with it now, but at least it is a running wagon that I can add to the layout when I finally get around to building it! So a 6/10 effort here, hopefully the next one will be better!

During painting.

The transfers left a nasty yellowish tinge after application.  It looks like silvering, but I am convinced it is the glue on the transfers.

Monday 26 August 2019

SPV finished for parcels traffic

Several years ago I committed to building a rake of parcels wagons for use on my layouts.  Since that time I have built far too many wagons to cram into the small layouts that I operate.  During a phase of kit building I constructed three SPV wagons, sometime in 2015, and I have finally got around to finishing off the last of these three!  The SPV wagons are ex fish wagons and are built from the Parkside kits.  These kits are really simple to build and produce a great looking wagon. I constructed them as per the instructions except white metal buffers from Lanarkshire and 3 link couplings.

Another SPV on a parcels train at Charlton.

A short parcels trains, consisting of: A Bachmann CCT, Prrkside LMS CCT, Parkside SPV, Hornby SPV.

The kit was finished as per normal using an airbrush and Railmatch enamels paints.  I took time to blend in various shades of weathered BR blue.  The weathering is relatively light on the wagon, providing a contrast to other parcels stock I have finished. The transfers are Model Master, sourced from whatever odds and ends I had lying around.  This was all sealed up with some satin varnish.

The Hornby SPV and Parkside SPV at the end of the train.

So the summer jaunts of travelling around are coming to an end and I'm settling down to consider what I want to model this winter.  I have decided to have a go at another small layout - it is probably best not to describe this as a micro layout.  I am ordering the baseboards this week and hope to complete it in around 6 months.  In the mean time I am going to keep weathering some milk tankers, as the layout is set around a small station with a milk loading facility, in North Devon.  I will have this to build as well as plenty of other projects to keep me busy over the coming months.

Tuesday 6 August 2019

Here comes a (small!) milk train!

After finishing the detailing of the first Dapol milk wagon, I realised that the non-factory weathered wagons were a better bet for detailing than the weathered ones.  I know the Dapol tank contains a multitude of sins, but unless I am willing to pay £30+ for a brass kit, which I am not sure I have the skills to complete, I am stuck with them!  However, I think that with a bit of painting the wagon is a passable generic representation of a milk wagon.

The recently finished tanker on the right and the first attempt on the left.

So for this one I started off with a non-weathered version.  I dismantled the wagon, fitted three link couplings and gave it a wash ready for painting.  On the underframe I tried to pick out some details using rust, weathered black and white, blended in with some frame dirt and sleeper grime.  On the wagon body I tried to run vertical streaks down the body, to give an impression of water running down the tank.  This was all sealed up with a few coats of satin varnish before reassembly.  I think this wagon looks much better than the first one, although a bit of variation in a rake is always a good thing.  I have about 3 more to go, to enable a decent length milk train to be run - hopefully in time for the layouts next exhibition in November.

A class 25 on the mixed freight with the milk wagons at Charlton.

Friday 26 July 2019

Bachmann Class 37 with DCC sound

I am continuing with my program to detail some diesels and add DCC sound to them. It is a bit of an eclectic mix at the moment, just locomotives that I had already purchased some years ago but never got around to updating.  The latest one out of the workshop is a Bachmann Class 37, in railfreight livery.  This was the first locomotive I ever purchased with DCC sound on board and it was a game changer for me.  Hearing a locomotive with sounds changed the direction and goal of what I wanted to model in future.  It was factory fitted with a lok sound ver. 3.5 decoder and Bachmann sounds, which to be honest were a little naff.  I had also never got around to undertaking the weathering on this locomotive, so it has just plodded around in a pristine state for years.  The railfreight livery is a bit outside of what I intend to model now, but I thought as I had this locomotive I would finish it off.

The finished class 37 running on Charlton.


Running into the station - the start off and idle on the Howes decoder is spot on!

As per normal the chassis was fitted with a 3 link coupling and the ends were detailed.  I dismantled all the components, such as bogies,removed the glazing and sealed off the lighting units.  I initially applied an all over body wash and removed parts of this with a cotton bud, before spraying various  shades of weathered black, frame dirt and sleeper grime over the locomotive.  The finish came out a little heavier than I originally intended and there was one coat of weathered black where the airbrush clogged and the effect was a little heavier than I was aiming for.  However, it looks ok, although there are a few areas I am not so pleased with - it definitely sits in my I could do better camp!

The finished class 37.

And heading back to Barnstaple junction.

The decoder was removed and sent off to Howes for reblowing.  Following this being replaced the locomotive was reassembled and given a test run.  I also gave it a little outing at the Pevensey exhibition last week, although as I was running 1970s BR blue, I did it when no-one was looking!!!! A class 47 and a class 33 are now nearing completion and I will update these on here soon, although I head away with work for most of August, so it could be a little while before the next update.

Saturday 20 July 2019

Pevensey Exhibition

Today I am absolutely knackered after exhibiting Charlton at the Pevensey Exhibition.  This was a 'local' show, although for the first four hours it was non-stop and absolutely jammed.  Thankfully it did tail off a bit for the final couple of hours, which was nice I was fried from operating the layout solo!  For a small show I thought the standard of the modelling on show was extremely high.  There were some great layouts - although given that I had very little time to look about I did not take any photographs.  However, there were some excellent layouts there and it was a very friendly show.  Again I had a lot of good conversations with different people which makes the whole event really worthwhile.  Generally the layout performed faultlessly, although the class 22 needs a good wheel clean.  Other than this it was clean sailing, the only problems being when I failed to set a point properly, driver induced error!

The layout set up and running.

For this show I set the layout at the back of the trestle stands and put the front drape over the rest of the extension.  I also increased the height of the layout by about 8 inches.  This stopped people touching the layout and it also stopped them leaning on the layout  - so no repeat performances of last time and the demise of the class 45!.  So a great show, great fun but very tiring!!!  

Class 25 on the milk train.

Class 22 on the parcels train.

Saturday 13 July 2019

Pottering about

Since the exhibition I have been pretty busy and have only made a bit of progress here and there with tasks.  The class 45 seems knackered.  After considering what to do I think I am going to send it back to Bachmann to get fixed.  I replaced the bogie and the broken gear tower, but there is something else seriously wrong with the chassis.  Maybe bent drive shafts or a knackered motor, I am not sure.  The locomotive does have some sentimental value to me - it was one of the first things I ever managed to finish properly.  Whilst I am not overly happy with the finish on it now, it was a very reliable locomotive.  So hence I think I am going to cough up the money and be done with it!!! 

A new project is to fit lights to this CK in order to finish a 3 coach rake for the layout.

So with the class 45 out of the roster I ordered a Howes DCC sound decoder for a class 33.  I finished a Heljan class 33/2 years ago and never got around to fitting in the sound chip. So I have taken this locomotive apart and it is currently sat in the modelling boxes waiting for some time tomorrow to fit the chip in. I think the speaker might need to go in the fuel tank so it is a bigger job than I was expecting - but hey these jobs often drag out don't they!  Recently, I have been weathering a class 37 in railfrieght livery.  This locomotive does not really suit the time period I am currently modelling, but it was the first sound locomotive I ever purchased, coming prefitted with Bachmann sounds.  I have sent the decoder off for a reblow and the weathering is finished, so I will piece this back together tomorrow - ready for next weekend.

The layout at the Blubell exhibition.

The new fronts being placed on the baseboards.

Other than this I am tidying up the railway ready for its next exhibition in a weeks time at Pevensey.  I am fitting some new fronts to the baseboards.  These come with the Tim Horn baseboard kits, but I never got around to fitting them.  However, these will tidy up the appearance of the layout no end.  I have also ordered a couple of posters to fit over the fiddle yard boards, with the name and details of the layout on them.  I have also started work on detailing a class 47.  I have just stripped down a mk1 CK coach ready to fit some lights into it.  Alongside this I have nearly finished another SPV parcels wagon and a milk tanker.  So lots of small bits of progress.  

The class 47 during the initial stages of weathering with an all over body wash done.

The class 47 chassis stripped down ready for weathering.

Sunday 30 June 2019

The Bluebell Model Railway Exhibition - a success (mainly!!)

Well I have just got back from my first exhibition.  I spent two days operating Charlton at the Bluebell Model Railway weekend, set up at Horsted Keynes.  This was my first exhibition operating a layout and the first time I have ever displayed any of modelling.  It was with a little trepidation that I turned up on the Saturday morning to set up.  I am pleased to say that I found the weekend a very fun experience, if not a little exhausting!  I was operating on my own, so keeping something moving all the time demanded quite a lot of concentration.  However, the days flew by and it was fantastic to have some dedicated running time.

The layout set up ready to go.  The black drape needs a little work!

The class 45 running in a passenger service - before it was sent flying to the floor!

Like doing anything for the first time, it is a steep learning curve.  The layout behaved faultlessly, with the exception of one loose wire on a point that occasionally needed a tweak. The engines behaved beautifully and the slow speed running and shunting was fantastic.  I was also happy with how the couplings worked, although I realised pretty quickly that the class 22 could not be coupled up to a coaching rake under the gaze of the public - the body skirt essentially hides the coupling.  However, with the Western and class 45 on the passenger service, plus the class 22 or 25 on the freight side, everything worked really well.  I also quickly realised that I tried to cram far too much stock into the fiddle yard and slowly reduced this over the weekend.  A freight train or two, a passenger service and DMU were more than sufficient to keep the layout working.  

View from the other side.

A busy moment as the western heads out on another passenger turn (what happened to the windscreen wipers??.....

However, there was also a slight downside, with a woman who inexplicably gave the fiddle yard a frightful bump and sent the class 45 clattering onto the concrete floor.  I was a little annoyed, but she did apologise - I have realised that people do get too close, so next time I am going to set the layout further back than I did this time.  However, other than the class 45 now being completely knackered, this was the only down side.  I realised that I need a lip on the fiddle yard to stop this happening again, so this will be installed before its next outing.  This was certainly a preventable problem and was caused by my own inexperience of not having exhibiting before and realising that some people are not that spatially aware!!  The western also somehow lost a pair of windscreen wipers and the roof fell off the BY wagon, but there are easy fixes.  Other than these very minor issues, the weekend was fantastic and I am keen to do more.  There were a lot of great conversations and some very kind comments, making the whole experience very rewarding.  It also gave me a lesson in not being too precious about the layout - it was built to be used.  I can see that taking it to exhibitions will cause some wear and tear, but I think better that than just keeping it at home.  Thank you to anyone who came to see the layout and I hope you enjoyed it!  Off to Ebay now to get a new class 45 bogie and gear box!!

The class 45 stripped down tonight, ready for repair.  It needs a whole new bogie plus gear box.  However, as luck would have it, I think there is one on ebay right now!  Hopefully this should not be too difficult to fix and patch up.