Pages

Sunday 30 September 2018

BR mk1 coach lights part three......

Some seven years ago I ordered two Express Models lighting kits for BR mk1 coaches, being a BCK and SK.  In 2011 I finished the BCK (see here http://choppersrailway.blogspot.com/2011/06/bck-coach-lighting-ptii-vanfit-and-some.html); well seven years later I have finished the SK!  It is somewhat frightening how much time has passed since then!  I now have a finished, fully lit short rake of coaches for operation on Charlton.

Finished mk1 SK coupled up to the BCK.  The effect of the ligting is clearly visible in this picture.

Again the effect of the lights at dusk are clearly visible, coupled up to a western, ready to leave towards Barnstaple.

The first thing to do was take the coach apart and remove the glazing, separating the roof from the coach sides.  The bogies, underframe and roof were all weathered with an airbrush separately, whist the coach sides were treated to a wash of weathered black and frame dirt, with the majority of the paint being wiped off. The interior needs a c. 5mm reduction in height, achieved using a dremmel, to allow accommodation of the lighting unit.  Once this was tested for a good fit, the interior had the seats painted and some passengers added.

The coach which has been taken apart ready to start.

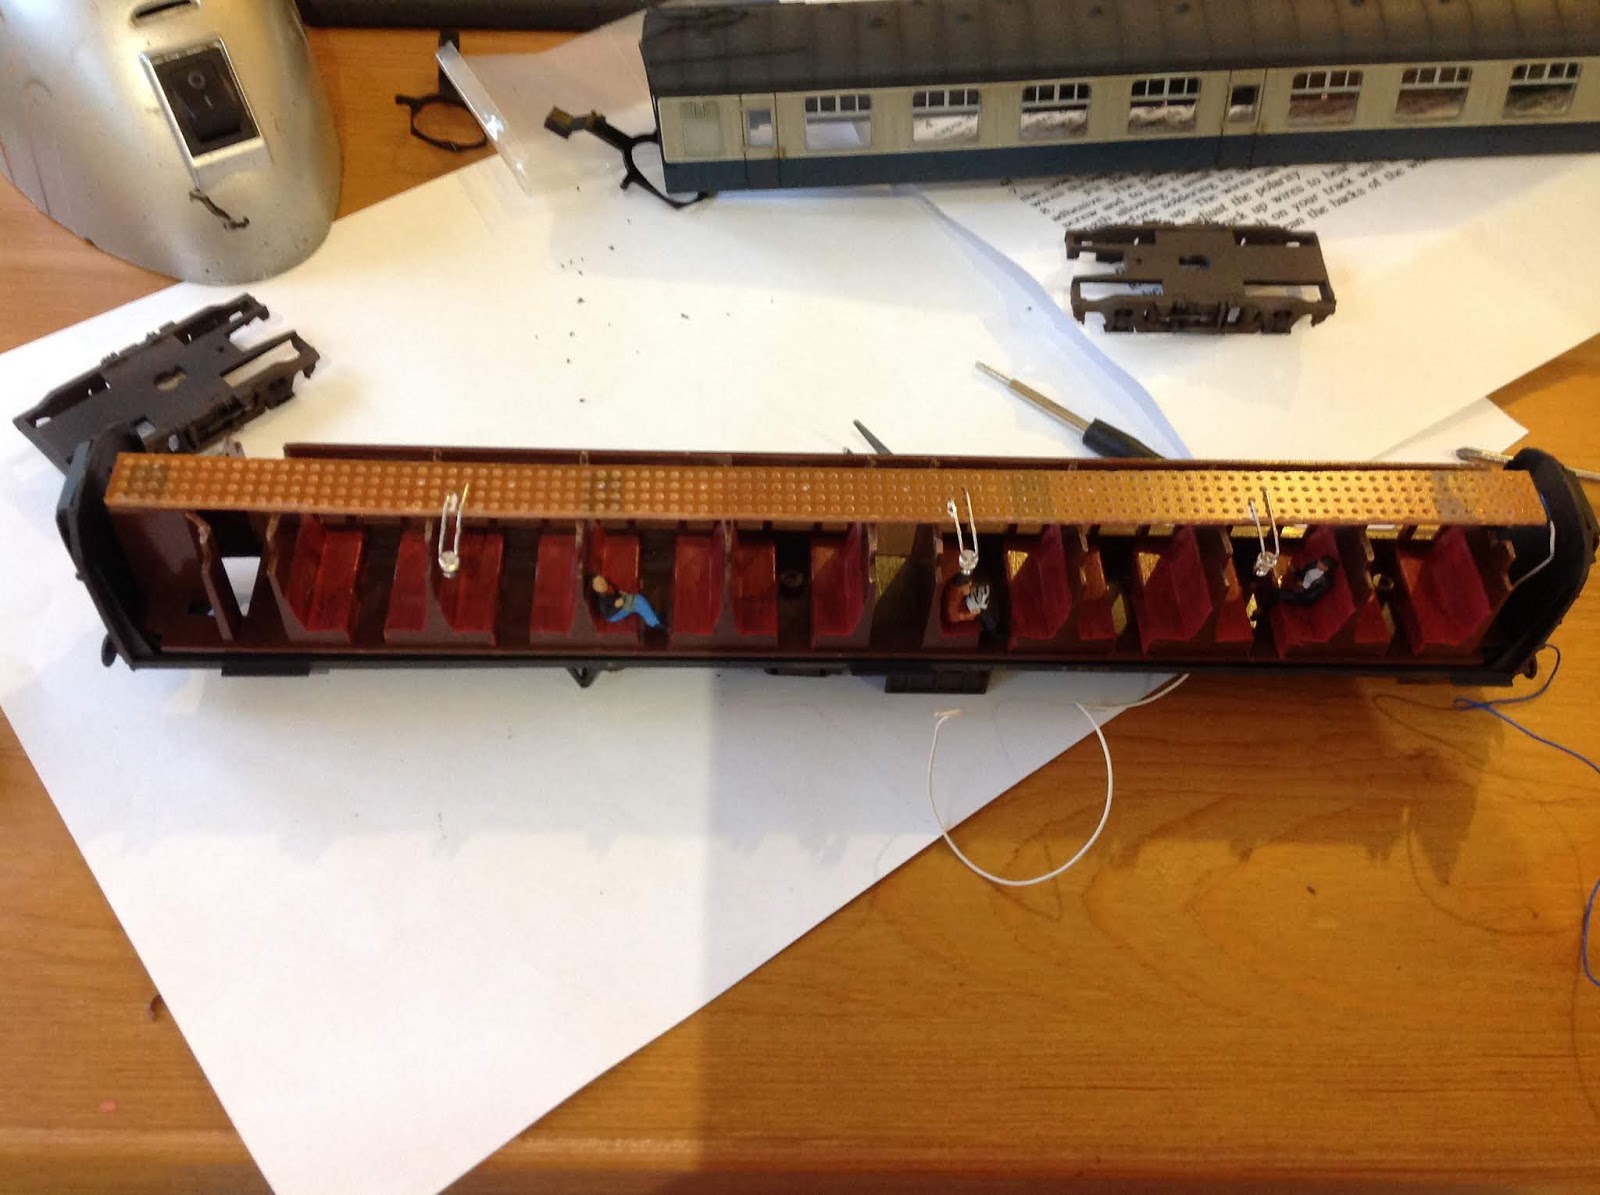
The various components ready for reassembly; note the painted seats and passengers added.

The glazing was then glued back to the coach sides and the sides were glued back onto the roof, with some plastic strip added to the gap between the two.  This join was filled with glue and glaze, and after it had set, it was painted weathered black.  This stops light bleed between the coach sides and the roof.  The coach was then reassembled and some blending together of the underframe and coach sides was achieved using the airbrush.  The bogies were then screwed back into place, with the picks up soldered onto the brass strips, to collect current from the coach wheels.

The join between the roof and the sides has had some plastic strip glued into it, then filled with glue and glaze before painting black to seal the join.

The fit of the lighting unit, with the interior cut down to accommodate the unit.

This has been a really good project and one that moved through to completion reasonably quickly.  The connector between the two coaches uses the Bachmann coach pipes which fits into the nem socket.  The end of each coach has a 3 link coupling added, to make it compatible with my rolling stock.  I have read several internet forums that say not to use 3 link couplings on coaching stock, due to the problem of uncoupling from the locomotive.  I have not found this to be the case, although of course sometimes it takes a couple of efforts.  However, different locomotives are easier to use.  The western coupling is easily accessible, whilst the class 45 coupling is very difficult.  However, it is essential to couple from the coach to the locomotive, as it is nigh on impossible to couple from the locomotive onto the coach under the end connector.

Ready to head back to Barnstaple.

The Express models lighting kits are very good, although they are quite expensive.  I have a further one to fit to a BSK.  However, I recently saw a thread using lighting kits for MK1 stock from 'layouts 4 u', which are under half the price, including an anti flicker unit.  So I have ordered a couple of these.  I would like a 3 coach rake to operate Charlton at exhibitions, although the 2 coach rake makes the payout fully operational now with 1 passenger train. It is great to have proper coach lights to complement the sound and lights of the locomotives.  I just need to get a move on with finishing this layout!

Sunday 23 September 2018

Charlton - further progress and some train running

Another stint of away working had disrupted the push towards finishing Charlton.  Whilst the whole layout is now operational, there is a lot of detailing work to still be done.  The layout had been put away for a couple of weeks, so this weekend I put it up in the living room and set about running some trains - in order to find a little bit of inspiration for a final push.  There are multiple jobs to complete on the layout, each of which takes a little time, so it can feel that progress can be a little slow.  However, I have finished adding lights into the SK coach, meaning I know have one fixed rake of coaches to use as a passenger service.  

Short rake of MK1s with lighting completed ready for use on the layout.

The class 45 runs the early morning passenger service into Charlton - the effect of the coach lighting is clearly visible in this video.


Class 31 shunting some goods wagons around the fertiliser store ready for off loading.

I loaded up the fiddle yard with a passenger service, a parcels train, a small fertiliser goods train for the provender store and an ECC china clay working. These are the general formations that will operate the layout, with the only addition to this being a DMU.  It was great to get a feel for how the layout operates and the sequence of arrival and departure of trains.  In the main the simple track plan works well, although it is slightly intensive using the 3 link couplings on each train, especially under the coaching stock. 

Class 31 ready to drop the emptied wagons into the siding.

A class 25 has collected some ECC wagons from the local quarry and collected the empty fertiliser wagons, now ready to head back to Barnstaple.

A western runs round its train and is ready to head the service back to Exeter St Davids.

Playing around with the layout has meant that it has been possible to compare the DCC sound outputs of several locomotives running on the layout at once.  What is quite clear with these locomotives running around, is that there is a large difference in the sound outputs from the locomotives, both in volume and in quality.  These locomotives have been sound fitted by myself and have used different speakers - and the end result is some variation in sound output.  I am now going to do some more serious experimentation with speakers in an attempt to improve the sound quality of the locomotives.  I have ordered some iphone speakers and will look to replace the speakers in the Class 45 and Western over the coming weeks.  However, a fleet of 3 sound fitted locomotives plus a DMU are more than enough to make the layout fully operational.  So some focus on finishing off enough trains to make the layout work is in order, with a class 22, a class 25, a class 42 and class 52 the chosen locomotives to operate the sequence, at least initially.

Parcels train heads into Charlton.

A western departs back to Exeter, via Barnstaple jn.

So lastly, back to the layout, an office block has been purchased to place alongside the provender store.  I am currently painting a fence for this.  I need a fence along the front of the layout too.  Another fence is needed to join the tunnel to the main layout board, and this too has been constructed.  So lots of painting of these now, to move these ares through to completion.  The station also needs detailing, and I have started painting up some station signs to finish off this area too.  So some glacial progress, but progress none the less. 

A class 31 backs some wagons towards the provender store.

Sunday 9 September 2018

Charlton Provender store and signal box - some layout detailing

This weekend I had the rare commodity of some time to spend modelling!  The area of cobbles that has the provender store set into it, had been held up by the painting of a fence.  This fence was completed and glued down, acting as a barrier between part of the cobbled area and the rails.  The provender store was glued in place and the ballast was finished around the now derelict signal box.

The provender store now glued into place with some grass being added.  There is some more to do here, including thinning out of the grass (weeds!).

I have then spent the rest of the weekend glueing down bits of scatter grass and bushes - a combination of small bushes made from rubberised horsehair and also some commercial ones.  I also used dollops of PVA glue to glue in static grass around the base of buildings, and have started adding a little grass to the station.  The aim is to create a layout in the 1970s that has survived the axe, just, but is now a shadow of its former glory.  Hence there should be weeds growing everywhere! There is some hovering up and thinning out of the static grass that needs to take place, but it is starting to all shape up.  I am very pleased with how this area of the layout looks.

The after view, with some clumps of foliage added around the based of the buildings.


The before view with the provender store glued down.

So next steps are to sort the station out with custom nameboards and some station furniture to bring this to life a little and finish off the car park behind the station.  Hopefully I can get into those bits next weekend.

Some flowering weeds have been added to the siding.

The scribing of the cobbles was well worth the effort in this view.

Close up of the weeds at the base of the provender store.


View of the dereliction at the end of the station.  Note the weeds have taken hold even in the guttering of the signal box!