Pages

Friday, 20 July 2018

A class 25 and a summer interlude

Over the last couple of weeks I have managed to find some time to finish off the detailing of my Class 25 project.  This is the Bachmann DCC sound version, which had the chip reblown by Howes.  This has now been fully run in on the layout and I am delighted with the sounds, and pretty pleased with the overall result on the locomotive.  

Finished Class 25.

However, I have also managed to run out of time. I am heading away for the next 3 weeks, so in the mean time here are a couple of videos of the locomotive running around on the layout.  I will write a proper post about this when I return, when I will pick up blogging and modelling again later in August....until then enjoy your summers!

Running a rake of spoil wagons into Charlton, with flange squeals a plenty!

Running light out of Charlton station.

Sunday, 15 July 2018

Backscenes part deux!

Well after the last semi disaster with the backscene, I ordered an ID models photographic backscene, which has self adhesive backing, and some 0.3mm foamex sheets.  I choose an overcast day, with some blackening skies, typical Devon in my years of living there!  I ordered the foamex boards slightly too big for the backscene, but in 3ft lengths (same as the baseboards) and set to work applying the backscene to the boards.  I undertook this on my own in 3ft strips, and it was just about manageable as a 1 person job.  I started in one corner and slowly worked my way over the foamex board.  I managed to stick all of the sheets down in about 4 hours or so, and managed not to get any air bubbles on the finish.

Backscene cut into 3ft sections and attached to the foamex sheet.

The backscene and foamex trimmed to size.

When I was reasonably happy with how this was shaping up, I tore off the old backscene and removed the terraced houses and signal box, which had been glued down.  This was a awkward job to do, and in the process I wrecked the yard lamp.  However, I was determined to make a better effort this time, so quite a bit of the original scenic work was sacrificed.

Finished backscene looking towards Ilfracombe.

Looking towards Barnstaple.

I then cut the boards to the size of the backscene and started to glue them onto the layout using PVA glue.  In typical Murphy's law I was about 1 inch short of backscene, so I had to fudge one corner together, I will let you work out where!  However, after a good day of fiddling around, I have pretty good backscene.  Like all my modelling it is not quite perfect, but it is a vast improvement on the first attempt.  It does not dominate the scene, but it does provide some context to the model.  As this layout is a test run (although it does seem to be dragging on a bit!) I am pretty happy with the overall effect.  So now onwards with finally getting some buildings (re)glued down and some proper scenery detailing!!  I can also say with confidence that I have found a way of making a satisfactory backdrop for my layouts and this is a big step forward for me.  I will certainly use this method from now on.

Backscene visible behind a class 25 in the sidings, it does not dominate the picture, which I like.

View of the layout, showing the backscene.

Thursday, 5 July 2018

Backscene woes....and crinkles!

Well last week I felt I was making some real progress on the layout.  One  morning I was rummaging around a box in the railway room and found some old Gaugemaster backscenes I had long forgotten about.  I had originally decided on having a white painted backscene, but I had become increasingly unsatisfied with how this looked.  So I placed the Gaugemnaster backscene on the layout with blue tac to see how it looked.  It totally transformed the layout and it made me immediately decide to add a decent photographic backscene. The problem is I had already glued down the signal box and the house flush against the original painted backscene.  However, I purchased some Delux models Backscene glue and set to work to glue down the blue sky.

The Gaugemaster photographic backscene blue tacked down to see how it would look.

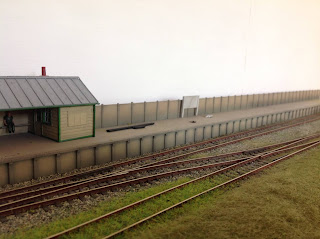
Same shot with just the painted white fibre board.  The difference between the two photographs is stark.

Well, the end result was a semi-disaster!!  Only semi - the sheets of the Gaugemaster photographic backscene I had must have come from separate batches.  Consequently, the colouring is slightly different between them and makes a terrible join behind the station!  The original painted wooden backscenee is a painted fibre board and the Delux models glue must have caused it to swell slightly.  Where I applied the glue there is swelling and crinkling on the photographic paper.  It is not too bad, but it is certainly noticeable.

Join between two of the sheets!

View back down the layout with the signal box removed.  The crinkles and join are far to distracting.

So two lessons learnt are 1) a better photographic backscene is needed, and 2) my skills in creating the backsence are limited!! I spent a bit of time thinking about it and came up with a plan.  I have ordered some 3mm foamex boards and an ID models self adhesive backscene.  The plan is to stick the photographic backscene to the foamex boards and then glue these onto the layout.  The only problem is I have to remove some of the detailing work already done, although this is not too onerous, but it means the signal box and terraced houses need to be moved.  The signal box came off easily enough.  However, I am summoning up the courage for the terraced houses.   

A few of the sort of effect I hope to be able to achieve.