Tuesday, 26 December 2017

Charlton Micro layout - further progress

A short update on the developing micro layout that I am  building.  I have nearly finished all of the boring jobs!  Not quite, but a large amount of progress has been made.  The back scenes are now all attached and require painting. Given the narrow width of the of the baseboards (1ft) it would have taken too much space to have a curving backboard, so I have settled with 90 degree angle in each corner.  Not ideal but I hope I will be able to disguise it.

Back scenes in place, ready for painting
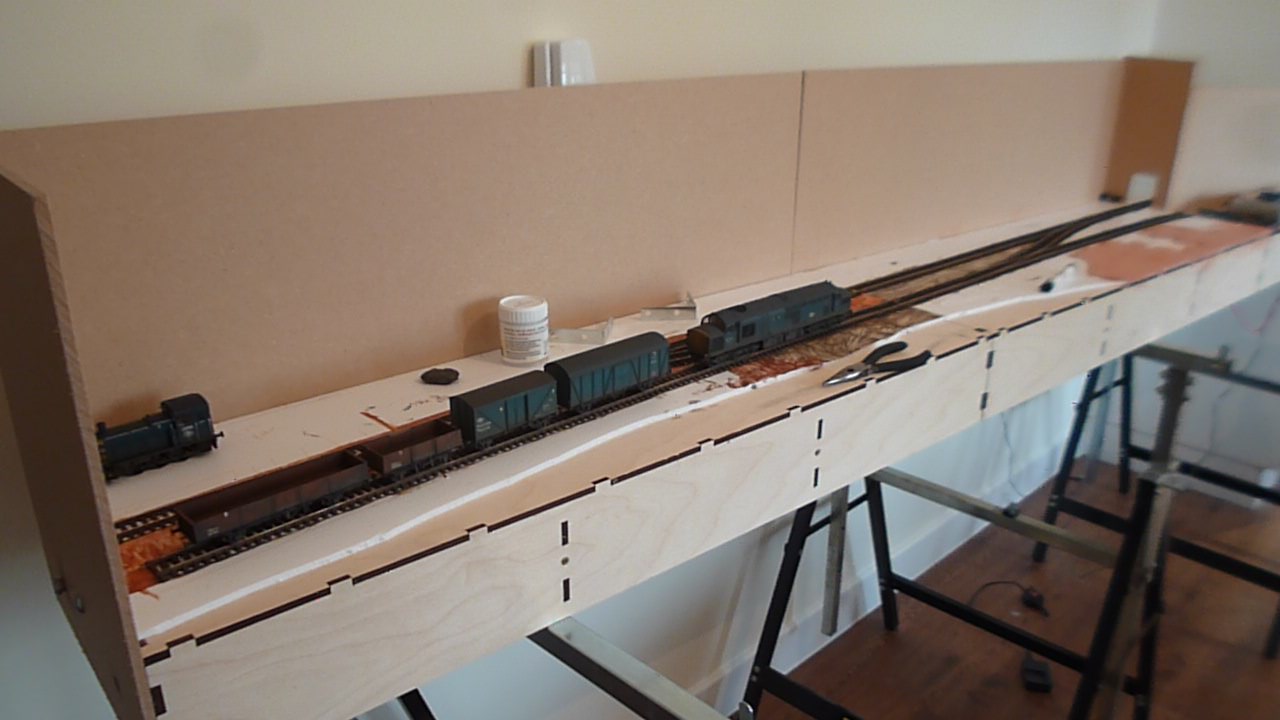

General overview of the micro

The fiddle yard has been built and has a small area for continuation of a siding on the scenic side at the front. Being only 3ft long it is a very tight fit.  The entrance to the fiddle yard is a thin piece of back scene with a small hole cut into it (obviously!).  Rather than have a tunnel I am going to try to disguise this as much as possible, but not worry too much about it. The powerbus has been extended under the fiddle yard and some track has been temporarily laid down.

The small entrance to the fiddle yard

So now there are two last jobs.  The first is to install the point motors, I am using the Gaugemaster PM10s with frog juicers.  A simple fix for a small DCC layout and all seems to be working well.  The CDU is installed and it is just a case of placing the motors under the boards and wiring them up - although this is a pet hate of mine!  The second thing to do is is lay two sets of points into the fiddle yard and glue these down properly.  Just one more weekend of soldering and fixing and then the whole layout should be 100% operational!
  
Just testing out some the positioning of the buildings....

So time for the buildings.  I have some resin buildings to use, and these will be supplemented with a bit of basic scratchbuilding.  I am not great at making buildings, so each attempt gets a little bit better.  I have to make the station, which is a job to start at the end of next week.  However, I am pretty happy with the current level of progress and my aim is to finish the layout by the end of February.  I had originally gone for a Christmas date - but that now seems unduly optimistic.  The great thing about small layouts is that you can seem to make progress quickly!

A quick video of the layout working....

Now to get some type 2 sound decoders to run on a class 22 and 25.  I have finished the western.....now I wonder about a warship......this layout is definitely going to be pure BR blue and plenty of sound....

Monday, 25 December 2017

Merry Christmas

Wishing everyone a very Merry Christmas

See you in the new year

Saturday, 9 December 2017

The western front - Heljan class 52 ready for service

I have finally just about to managed to finish off the Western detailing project I have been working on for a while (2 years or so!!).  It has been a really fun project and overall I am pretty happy with how it has turned out.  However, the longevity of the project and the stop/start nature of it meant that I lost some of the parts along the way, as well as a bit of momentum.


The finished locomotive running around the microlayout.

The locomotive is for use on the my Devon based withered arm layouts, that are struggling through the 1970s.  The model is the Heljan version, which I think is an excellent model by and large.  I replaced the original wheels with Ultrascale versions which has improved the running characteristics of the locomotive no end.  All painting and weathering was done with railmatch enamels via the air brush.  Faded blue was spayed on the body, as well as matt white from a paintbrush to replicate paint chips.The model has been fitted with a loksound decoder, with the Howes sound files.  I really like the Howe sound recordings on this one - I think it sounds it great, although I will turn the volume down a bit to about 75% of its current level when I have the track operational on the new Charlton micro layout.  I attempted to model the locomotive towards the end of its working life and it is therefore pretty grimy.


The finished locomotive posed on the micro layout.

Jobs that have been finished off this week are the adding of windscreen wipers, some detailing of the windscreens and a bit of wheel painting and then cleaning.  Small jobs that do make a big difference.  So below are some finished photographs of the Western.  I have also included some photographs of the locomotive in its various stages of painting and detailing.

The cab showing the weathered front.

With the lights working.

Body side, showing faded paint and open windows.

Detail of the bodywork a bit closer up.

The body shell during painting and weathering from the airbrush.

Reassembled locomotive, before final detailing.

The first stage of weathering involved splashing white paint over the body work and then hand brushing some grime over the body, before wiping some of it off with cotton buds.


As it looked from the box, a second hand model.


Thursday, 30 November 2017

Micro layout progress

Over the weekend I have made some progress on laying the track on the micro layout and getting it all soldered up ready to go.  I now always use electrofrog points on my layouts, as I run all my layouts via DCC.  This time I have added gaugemaster point juicers to the electrofrogs and I am really impressed with how they work.  This takes the pain out of wiring up seep motors and positioning them almost perfectly so they make a full throw and switch polarity.

Underneath - using the Express Models powerbus kit

Under the baseboard is the Express Models powerbus kit, which is really easy to use and this time I have kept the wiring relatively neat - I have even used a colour coding of sorts!  A job for this weekend is to fit some underboard point motors and build a control panel.  I still have to get the backscenes sorted and I have only just ordered the final baseboard for the fiddle yard, although this might also have a small scenic section on it.  I am waiting for the final baseboard to arrive before sizing it up to see exactly what I want to do with it.  I also need to order a couple of stands, to be able to set the layout up with out using my table!

Full view of the layout so far

It is great to have somewhere to run trains again, although it is very limited what running I can do without the fiddle yard in place.   However, with the western just about finished it is great to have somewhere to put this through its paces and listen to it idle away.  I am going to make a start on building the station to this weekend and have been collecting a few bits and bobs ready to detail the layout.  I am hoping to have a big push on doing the scenery over the xmas break, so want to get all the boring bits (point motors, back scene, etc) finished to be able to spend time detailing the layout.


The first trains are running on the layout!

Thursday, 23 November 2017

13t Open wagon ready for service

Well there has been a little bit more progress on the modelling front with another wagon for the layout.  This is a 13t open wagon with corrugated ends, which is built from the rather excellent Parkside kit.  It has H&A steel buffer heads and model master transfers.  This one is set for revenue earning service unlike the last one, which is was finished for the engineers department.  I have a couple more of these to build, but I have halted any more wagon building until the layout is operational and I have cleared the painting on a a back log of built but unpainted wagons.  Currently in the paintshop is a dance hall brake van, a grampus wagon, a tunny wagon, a dogfish wagon, a LMS CCT, a Western, class 31, a ratio 13t open wagon and a plate wagon.  I can't keep track!

However, I will soon have somewhere to run these wagons with the track laid on the micro layout and a fiddle yard ordered.  The weekend is going to be spent soldering this up and starting to place some of the key elements of the layout.  All in all steady if not slow progress, but the aim is to have the micro layout in full flow by the xmas break, whilst Pottington Quay remains in storage.  Hopefully I can retrieve Pottington in the new year.  Until then I have plenty to keep me going!
  
13t open wagon with corrugate ends, finished in a later bauxite livery.

Note a great photo, but the corrugated ends are clearly visible.


Sunday, 12 November 2017

22t tube wagon ready to rolll

Having returned from the Med with work late this week I have achieved very little modelling.  However, I did manage to find a couple of spare hours on Saturday morning to finish off a 22t tube wagon.  I think that this wagon has been built over two years and it is great to see it finally finished off.  I attempted to model some replacement planks in the painting of the model, with a weathered bauxite finish.  Although I sealed the wagon with Railmatch matt varnish, the overall effect is more a satin finish.  The weathered finish is quite dark overall, but overall I reasonably happy with how it turned out and I am looking forward to running it on the layout.  This week will see the commencement of track laying on the second board of the new micro layout.  More updates to follow.

Another wagon finished, posed on the developing micro layout.

Saturday, 28 October 2017

A bit more Western Progress and a VEA wagon

There has been very little modelling over the last couple of weeks, partly due to a lack of time and a nasty bug did not help my motivation.  However, a couple of projects have crept forwards.  The first up is a VEA wagon which has finally been finished, which I think has taken over 3 years from building to finally adding the transfers.  This is the second of 3 VEA wagons for the layout that has been finished.  I only used microsol/set for the transfer application and I am really happy with the application.

Finished VEA van.

The Western has also seen a bit of further progress. I added the footsteps to the chassis before re-adding the body shell, and I must confess I found them baffling.  I had to substantially shorten them, to stop them fouling the bogies, which made them too wide for the body shell.  This means the body shell now sticks out too far on the chassis.  This requires the footsteps to be sanded down a little, before this locomotive is finally finished.  However, it is starting to shape up and just requires this modification to the footsteps and the wheels to be painted before this is finished.  I have also made a start on the new layout, with some of the track cut to size and the power bus installed.  However, everything is now on hold as I head to Greece for a couple of weeks with work.  I intend to source all the parts for the layout for when I return, so hopefully I can spend a weekend wiring the new layout up when I get back. 

The western with the body shell added.  Those wheels need toning down.


The reassembled Western.